photography, travel

BACKPACKING + PHOTOGRAPHY

There is no disputing that some of the best, most unique images are created while backpacking. Why is that?

Well, for starters, not nearly as many photographers venture out far enough on foot to capture these rarely seen, pristine wilderness areas. It’s not as simple as pulling up to the next overlook in your comfy vehicle. You have to work for it. You have to carry everything on your back and walk miles upon miles to reach your shot.

So, aside from the obvious hurdle of energy exertion and being in good enough shape, what are the main obstacles to backpacking for photography? Well, simply put… weight. It’s the reason many pro outdoor photographers have made the switch to mirrorless cameras. Saving even ounces can really add up.

I have not yet mades the switch to the lighter, more compact mirrorless cameras. So I’ll be approaching this problem from the old-school perspective. But I believe I have some insight to give that will benefit both the DSLR photographers, and those who have gone mirrorless. The concepts for both are really one in the same. It’s all about saving weight anywhere you can.

First, you must try to accurately assess the location, and its specific gear needs/ requirements. I am including ALL gear here, not just photo related. If you can save ounces/ pounds with your general camping/ backpacking gear, that may mean the difference between taking a particular lens or not. For example, if you are backpacking the Pacific Northwest, you surely need to carry rain gear [waterproof jacket, pants, pack cover, tent fly, and camera cover(s)]. If you happen to be in the desert, leave most of that and simply bring the rain fly for your tent. If, in the off chance, it does rain, you can stash everything in the tent. There are certainly inherent risks in packing this way, but the reward may be that you save your back, and get the amazing shot you wanted. If you are new to backpacking all together, or just need some tips to pair things down, check out the godfather of backpacking, Andrew Skurka’s post on gear. It will prove insightful for both the novice and experienced alike. But keep in mind, he approaches this from a purely backpacking perspective, not photography.

Next, think through the possible shots you’d like to capture. This will take some research/ scouting. See my post on scouting for help if you are new to this concept. Once you have a detailed shot list created, this will help determine which (and how many) camera bodies, lenses, flash, tripod, intervalometer, filters, etc. you will likely need. Only bring what you really need to get the shots.

I have made the mistake so many times on excursions into the backcountry to take extra equipment that I thought I might need. This proved to be a waste of weight and energy exertion. I won’t downplay the difficulty in accurately assessing your pack list, but I also won’t downplay the importance to be as conservative as possible. If in doubt, just don’t bring it. Do more with less.

Make sure you have everything you need to survive, but be willing to sacrifice some comforts to get to a doable weight.

KNOW YOUR LIMITATIONS. I recommend doing some test miles with your pack fully loaded to see if it’s something you can even handle. Hike at least two miles to get a feel for it. The rule is, your pack, fully loaded, should not weight more than 20% of your body weight.

This is much easier said than done. My pack, when on a photo trek is frequently closer to 30% my body weight. I DO NOT recommend this. Stick to as close to (or below) 20% as you possibly can. Your body (specifically knees and back) will thank you as you get older.

It can be intimidating to head out into the wild with everything on your back, especially for the first time. But don’t let that stop you. The rewards far outweigh the struggle. A paraphrased quote from Teddy Roosevelt sums it up best… “Nothing worth doing is easy.”

In a world of the similar photographs from the same places, that everyone posts to social media, we must work a little harder to be distinctive. The unique experiences and photos you can create are everywhere. They are simply waiting for you to find your way to them.

–Andrew

If you are new to backpacking, and would like a helpful first experience, I am excited to offer a fully-immersive, guided backpacking and photography adventure in my favorite mountain range on earth, the Wind River Range in Wyoming. I have not officially announced it yet, but if you are interested, let me know, and I will put you on the “first notified” list. You will learn first-hand from me, as I lead you into the most beautiful wilderness area in the lower 48.


N O M A D  Magazine // Issue 1
Order your copy today and receive this 100 page full color travelgasm at your door!
Want to learn photography and enjoy a guided experience? Check out my exciting, NEW workshop dates:
INTO THE WINDS // BACKPACKING + PHOTOGRAPHY ADVENTURE
GRAND TETON // FALL COLOR // LANDSCAPES + WILDLIFE
TELLURIDE // FALL COLOR // LUXE LANDSCAPES
I’m excited to announce The Photographic Guide to Our National Parks” series of eBooks:
Rocky Mountain National Park
Grand Teton National Park
If you are interested in purchasing a “print from the road”, please check my prints for sale, or email me directly for a custom request:
Andrew Slaton // Limited Edition Prints
Andrew Slaton // Canvas + Metal Prints
If you are interested in licensing any of the images/ video from this post, please visit my stock agency:
Tandem Stills + Motion // Andrew Slaton 
For assignment work requests, please email me: andrew@andrewslatonphoto.com
Thanks for visiting AndrewSlatonBlog.com!
All images and content © ARS Media, LLC 2020
Standard
national parks, photography, travel

PARK PEEK // THE EVERGLADES

The Florida Everglades is not just a National Park, it’s an entire ecosystem stretching from Lake Okeechobee all the way down into Florida Bay and the Keys. It’s an incredible swath of land comprised of both public and private, as well as Native American reservation land.

For photographer and nature lovers, it is a heavenly realm.

I am obviously both, and I will try to share a small picture of what the Everglades experience is like. This land, like any worth preserving, is wild, and not for the faint of heart. It is for explorers and adventurers. It is for the people who bend to nature, not the other way around.

If you approach the Everglades from later perspective, it will break you. And you will have a potentially awful experience. However, if your approach is the former, you will roll with all of the wonderful and terrible surprises she has to offer the outsider. Once you step into this landscape, you are immediately aware that you are, in fact, an outsider.

Its flora and fauna are ancient.

Landscape photographers will find it challenging and frustrating, but also ultimately unique and rewarding. It is where the sky and water unite, and weather creates chances for incredible drama. There are rivers of grass, reflective lakes, pine uplands, cypress bottomlands, brackish canals, and wide open salty bays.

The opportunities for detail and macro images are everywhere.

And the birds… Especially in winter, the amount and variety of birds is astonishing.

The Everglades is also home to the endangered American Crocodile, one of my favorites.

It is also home to one of the most storied wildlife comebacks in history, the American Alligator. Once hunted to near extinction, the species was added to the Endangered Species list in 1967. Now, just over 50 years later, alligators populations are estimated to number over 5 million in the wild. It is, perhaps, the US Endangered Species Act’s most successful project.

Throughout the history of south Florida’s urban development, much of the natural flow of water was impeded. It was not until recently that the importance of this area was truly realized. Today, there are massive efforts underway to restore much of what was damaged.

Thankfully, the beauty and mystery of the Everglades is on full display for visitors. There is much work to be done, but what does remain of this place, is enough to inspire the young and old alike to cherish it.

I love sharing this area so much, and it is so rich with photographic opportunities, that in January/ February/ March of 2021 I plan to have two Everglades and two Big Cypress workshops/ tours. As of now, dates are tentative, and registration is not yet open. However, if you would like more information, please email me to express your interest, and I will add you to the list of first notified.

–Andrew

If you enjoyed this article and found it helpful, consider joining me on the adventure of a lifetime to learn so much more. I offer workshops and tours in many of the worlds most incredible locations, and on these trips, you will get tons of one-on-one time to ask me anything. In fact, I’m offering $250 off my Big Bend Wildflowers + Stars workshop coming up in March, for a limited time. Let me help inspire you to become the artist you’ve always wanted to be! 


Ellen and I hit the road full-time in June of 2016. We are on a mission to inspire and educate everyone on the importance of getting outside. Check out my workshops and my prints. The revenue will help propel us further on this great adventure. Enrich yourself and others… and feel great about it too as you’re helping to ensure our public lands are cherished and to keep the wild spirit of the American Dream alive. Our goal is to visit all 60 National Parks in 3-5 years. We are currently in year 4 and half way thru the Parks. LEARN MORE ABOUT WHAT WE’RE DOING HERE


N O M A D  Magazine // Issue 1
Order your copy today and receive this 100 page full color travelgasm at your door!
Want to learn photography and enjoy a guided experience? Check out my exciting, NEW workshop dates:
INTO THE WINDS // BACKPACKING + PHOTOGRAPHY ADVENTURE
GRAND TETON // FALL COLOR // LANDSCAPES + WILDLIFE
TELLURIDE // FALL COLOR // LUXE LANDSCAPES
I’m excited to announce The Photographic Guide to Our National Parks” series of eBooks:
Rocky Mountain National Park
Grand Teton National Park
If you are interested in purchasing a “print from the road”, please check my prints for sale, or email me directly for a custom request:
Andrew Slaton // Limited Edition Prints
Andrew Slaton // Canvas + Metal Prints
If you are interested in licensing any of the images/ video from this post, please visit my stock agency:
Tandem Stills + Motion // Andrew Slaton 
For assignment work requests, please email me: andrew@andrewslatonphoto.com
Thanks for visiting AndrewSlatonBlog.com!
All images and content © ARS Media, LLC 2020
Standard
advanced, education, photography

SCOUTING IN THE EVERGLADES

By failing to prepare, you are preparing to fail.” ~ Benjamin Franklin

An often overlooked aspect of photography is the time and energy needed to focus on pre-production.

Pre-production is a term we use in commercial photography. It’s the time leading up to the actual day of the shoot that we spend in preparation to iron out all of the details, so that the shoot can run smoothly. It really is no different with travel and landscape/ nature photography… Perhaps just a little less involved and stressful.

So, for the initiated and uninitiated alike, I have several tips. The first and foremost is the importance of scouting.

From “boots on the ground” experience in years past, I knew this shot was possible, so this year I waited for the prime conditions and was rewarded.

Scouting involves time spent researching locations; utilizing the web, books, social media, and “boots on the ground.” So where to start? Well, let’s take an example location and walk through my process. How about the Everglades, since I’m currently looking at this amazing place outside my window!

Preparation, I have often said, is rightly two-thirds of any venture.” ~ Amelia Earhart

Knowing from research that this was an area in which I could get close access to american alligators from a low angle, I was placed in the right scenario to catch a dragonfly resting on this gators head.

When I first visited Everglades National Park as a naive college student back in 2000, I did almost no research. As a consequence, I had an amazing adventure, but came away with very few decent images (and really those few were only by chance). Any photographers worth their salt will tell you that scouting is one of the most important ways to improve consistency in outcome. Really, this principal applies to everything. Preparation is one of the most important keys to success in any endeavor.

Learning from research that dragonflies are plentiful in this part of south Florida, I envisioned this shot months before it materialized right in front of me.

There are several effective ways to scout. Some more effective than others. Here, I’ll run through my list of methods…

First, know how to read maps. More specifically, topographic maps. This seems to be a bit of a lost art these days. With GPS and Siri, many younger folks have lost the ability. Reading contours, elevation changes, and even directions are very important if you want to scout before you even reach the location. I always either purchase a physical map, or download the 7.5 min USGS topos for free to my phone via the Avenza Maps app before beginning the scouting process. Properly reading a top map will help you identify potential areas of interest before reaching a location. If you do not feel comfortable reading a map, I recommend this great video by REI.

I had an idea to show human/ wildlife relationships in the Everglades ecosystem. After chatting with a friend who had heard from a park ranger that this alligator was hanging around a popular lake for kayakers, I was given my opportunity.

Next, I scour the internet for images of the place to which I’m traveling. Google image search and social media (specifically Instagram) are excellent places to start. Search geo tags of your location to get ideas and to visualize what images you would like to capture on your trip. Now, be advised that this can take a little discernment on your part, as some people incorrectly tag images. However, it should give you a broad sense of what is possible, and it will help you to create your ever important shot list. You will likely find many stunning captures when researching, so make notes of the specific locations that catch your eye. This may take a bit of diving, as some images on the web are a bit more cryptic with the location info, and for good reason. Blogs tend to have a lot of good info, so that may be a likely place to start.

Before anything else, preparation is the key to success.” ~ Alexander Graham Bell

There are only a few places in the U.S. to see the endangered American Crocodile. Proper pre-production led me to this fruitful location to get close enough to nature the reptilian eye.

Many photographers though, myself included, have become a bit more tight lipped about specifics in recent years. This is because of the massive spike in travel, and more specifically, photo-tourism, causing locations that used to be quiet, clean, and cherished by professional photographers to become overrun, trashed, trampled, and disrespected by the masses seeking their “trophy shot.” Rest assured, if you point-blank ask a photographer where a particular image was taken, they will almost certainly ignore the inquiry. After a short stint of widely sharing location info broadly over the web, it appears as though we’re back to the age of investigation to find places. And I’ve come around to think that is a better way.

Checking out (at your local library), or buying books on your location is one of the old, time-tested ways of scouting as well. Purchasing is especially helpful if you want to take them with you and if you plan to visit these locations again and again. However, when I’m researching on the cheap, the public library is invaluable! There are several good guidebooks that are specifically oriented to photographers, like The Photographer’s Guide To The Everglades by M. Timothy O’Keefe, for example. There are several in this series, so unless you are planning to visit a very remote location, chances are you will find a suitable guide to give you some ideas.

Guidebooks and previous in person experience gave me the knowledge that purple gallinules can be observed closely on the anhinga trail. I wanted an overhead shot to show the incredible feet of this colorful bird.

The Photographer’s Ephemeris and Photopills are both excellent apps that will help you to figure out whether your specific shots will be best at sunrise or sunset. This is an important step in the research process, as it will insure the best use of your time once you arrive.

At this point, you should have enough specifics and general info to create an extensive shot list. I start with specifics, images that are in my head that I want to achieve first and foremost. Then I add more general shots that I’d like to achieve. Since I’m a pro, I’m also thinking through different ways to make money with my time, so I will often list stock shots, creative projects, video clips, etc. Here is an example of what that might look like to give you an idea. I recommend printing this out before leaving for your adventure, that way, if you think of other shots, you can easily manually add them with a pen or pencil. Also, there is still some scouting to be done once you arrive!

Now that your shot list is made, and you have arrived on location, scouting moves into the “boots on the ground” phase.

Success is where preparation and opportunity meet.” ~ Bobby Unser

Great blue herons can be surprisingly skittish. I knew I wanted a detail shot if the feathers which would require a closer shot even with a 400mm lens. I found the right location to make this shot through research.

Believe it or not, it’s a good idea to visit the gift shop (or tourist shops nearby) and scour the postcards/ posters/ prints for more inspiration and clues. This practice is often rewarding, if only for inspiration. But sometimes a location or image idea will present itself when you least expect it.

Now is the time to use your map reading skills and spend the midday hours exploring. Drive, kayak, walk, fly your drone (where legal) to get a first-hand look at these lovely places you’ve been researching from afar. Note the challenges they might pose so you can be prepared when you return for the good light. And don’t forget to take your camera along! I know it sounds dumb, but depending on where you are, some great photo opportunities may present themselves to you even in the midday hours.

I’ve shot this particular location several times, but always at sunrise. This year, I decided to hike in the midday hours around it to see what a sunset shot might yield. I was again rewarded for the scouting effort.

This article should give you a road map to prepare better for your photo excursions, whether you are a newer pro or a hobbyist. I can assure you that Implementing these strategies is guaranteed to increase your rate of success.

Just like with anything, success comes to the prepared!

–Andrew

Give me six hours to chop down a tree and I will spend the first four sharpening the axe.” ~ Abraham Lincoln


N O M A D  Magazine // Issue 1
Order your copy today and receive this 100 page full color travelgasm at your door!
Want to learn photography and enjoy a guided experience? Check out my exciting, NEW workshop dates:
INTO THE WINDS // BACKPACKING + PHOTOGRAPHY ADVENTURE
GRAND TETON // FALL COLOR // LANDSCAPES + WILDLIFE
TELLURIDE // FALL COLOR // LUXE LANDSCAPES
I’m excited to announce The Photographic Guide to Our National Parks” series of eBooks:
Rocky Mountain National Park
Grand Teton National Park
If you are interested in purchasing a “print from the road”, please check my prints for sale, or email me directly for a custom request:
Andrew Slaton // Limited Edition Prints
Andrew Slaton // Canvas + Metal Prints
If you are interested in licensing any of the images/ video from this post, please visit my stock agency:
Tandem Stills + Motion // Andrew Slaton 
For assignment work requests, please email me: andrew@andrewslatonphoto.com
Thanks for visiting AndrewSlatonBlog.com!
All images and content © ARS Media, LLC 2020
 
Standard
education, photography, travel

#findyourpark | ROCKY MOUNTAIN

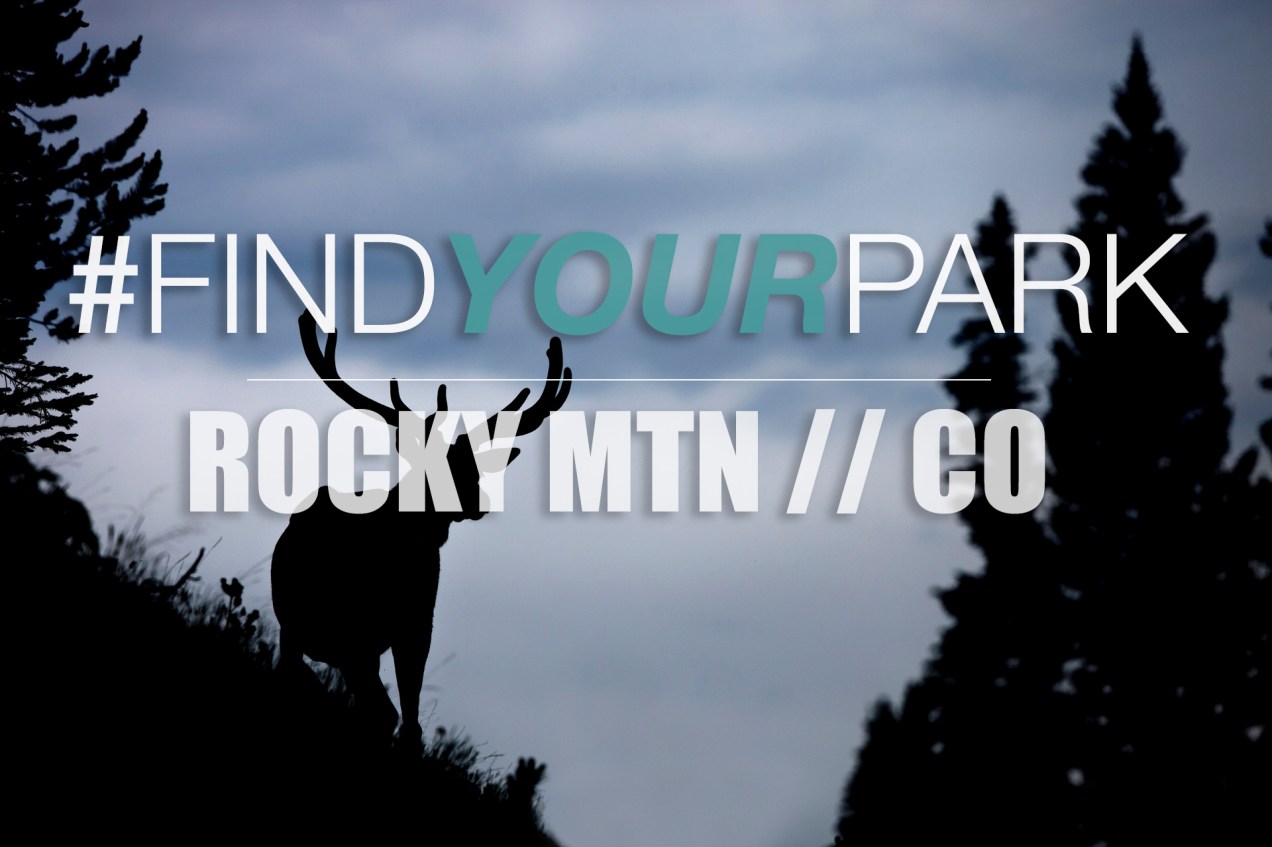
Rocky Mountain National Park in Colorado is the quintessential Summer mountain destination. With cool temps in the 40’s to upper 70’s, it’s a nice getaway from the sweltering heat of the lowlands. It is incredibly beautiful in any season, but Summer offers the most to see and do since the elevations can reach in to the 14k’s. And what better time to visit this iconic park, than the Summer of 2016, the 100th anniversary of the National Park Service.

I admit that I visited this park a little later in life. My family used to go camping in Colorado every Summer, but for some reason, we stayed mostly in the south/ southwest part of the state, in the San Juan mountains. I did not first visit Rocky Mountain National Park until 2013. But I’ve made up for lost time and visited many times in the last several years. It is a truly spectacular park with much to see and do.

There is so much to see and do, in fact, that this post is in no way comprehensive. It is simply a list of some of my favorites, and many of the “musts”.

ARS_RMNP_141023_1606

When To Go

As I’ve stated, Summer is definitely the most popular time of year, and for good reason; good weather (just watch out for afternoon thunderstorms!), abundant wildlife, easy access, etc. But Fall is spectacular with colorful foliage, no mosquitos, and energetic wildlife, frantically preparing for the harsh Winter to come. It’s moodier in the Fall. The weather is unpredictable and makes for more interesting photos.

Winter is quite nice in its own way as well, but very cold, and many of the roads are closed. The road to Bear Lake is open though. Winter transforms any mountain destination into a peaceful, quiet scene, and RMNP is no exception. Plus the crowds are virtually non-existent.

How To Get There

RMNP is one of the most easily accessed National Parks, as it is a short drive from Denver International Airport. Flights into DEN are relatively cheap, and so are rental cars. So whether you drive or fly, it doesn’t have to break the bank to get there.

From Denver, head north along I-25 until reaching Loveland. Take 34 to Estes Park, which is right outside the park. There are other routes to take from Denver, but I have found this to be the quickest, least trafficked.

Driving Trail Ridge Road at night, Rocky Mountain National Park, CO

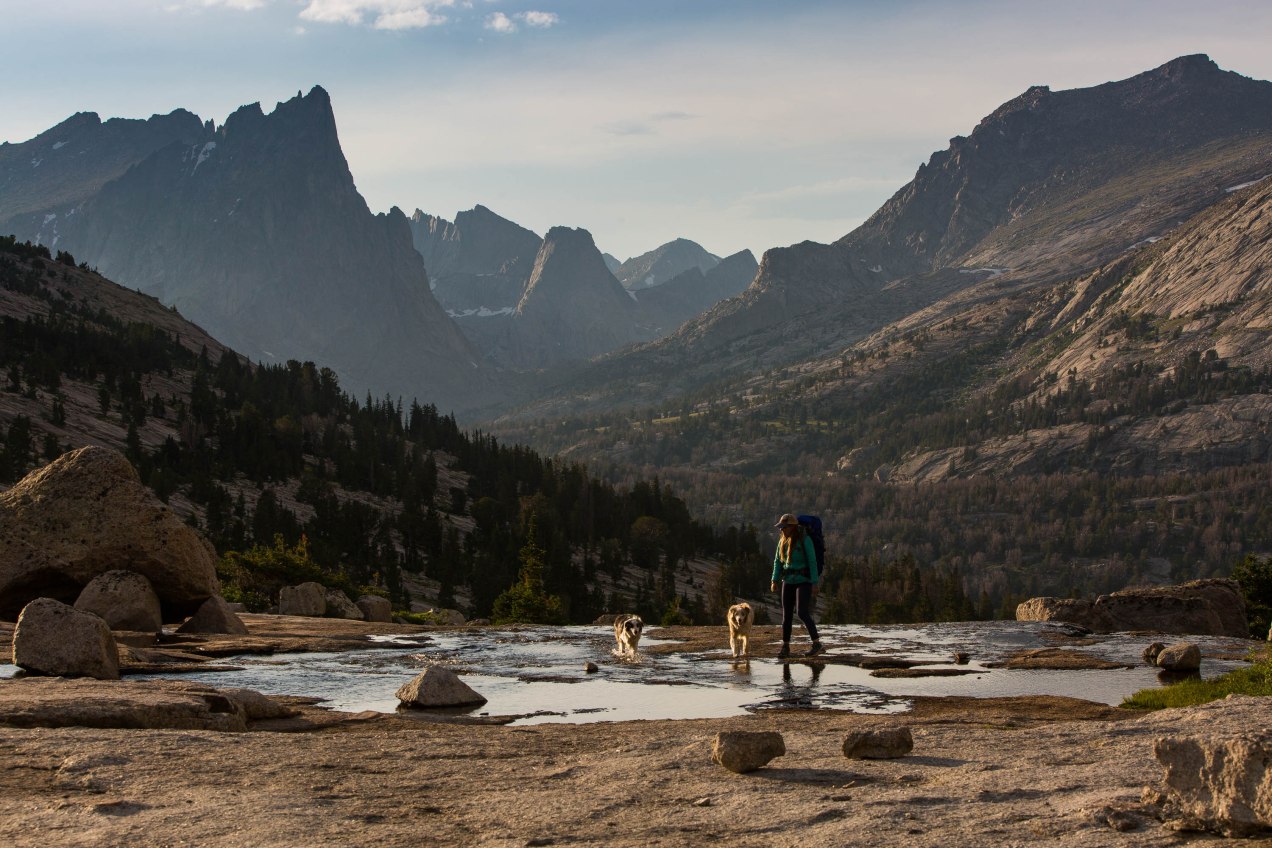
Be prepared for many cars, trucks, and RV’s on the road into Estes Park, and RMNP, especially in Summer. If you’ve been to Yellowstone or Yosemite, reference these memories. Just take your time and relax. Enjoy the scenery, even if traffic jams aren’t your thing :) Chances are, if you keep your eyes peeled, even with all the people and automobiles, you’ll get to see wildlife wherever you are.

Where To Stay

If camping isn’t your thing, there are so many options in and around the wonderful little town of Estes Park. From cheap motels, to swanky hotels with all the amenities, there is no shortage of places to stay within 15 minutes of RMNP. However, even with an abundance of options, the wise traveler will book as early as possible to ensure their desired accommodations. This area receives over 3.5 million visitors every year, so plan ahead.

If you’re a camper, like me, you can of course stay at any one of the developed campgrounds within the park, though they fill very quickly, especially in the Summer. There are even several NPS maintained campgrounds just outside RMNP, that serve as popular alternative access points to the park. For NPS camping info, go here.

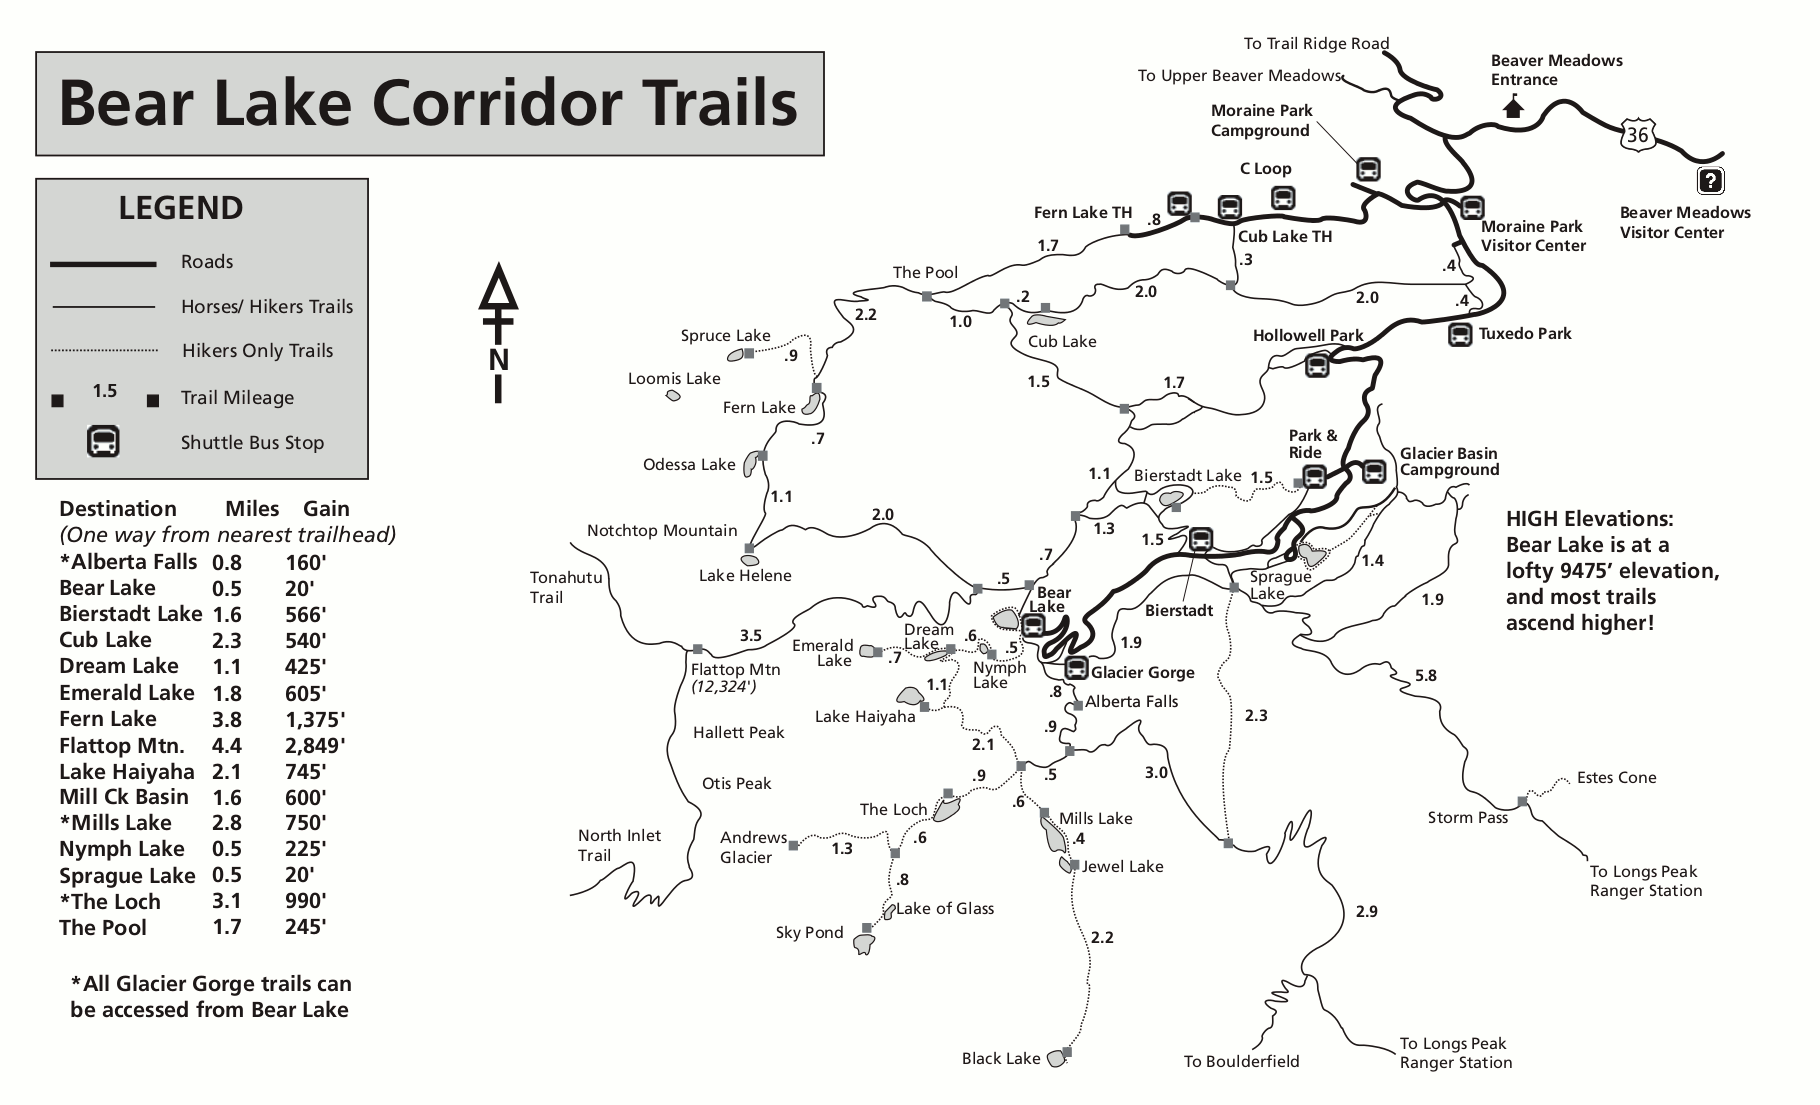
To download a full, detailed park map of Rocky Mountain National Park, click here or the image below:

Screen Shot 2016-06-20 at 12.16.56 PM

ARS_RMNP_0613_0249

As you can see in the map, the park is surrounded by National Forest. These can provide great, free (or low cost) camping as well, but keep in mind, it will be primitive. I’ve car camped several times in undeveloped Arapaho (west) and Roosevelt (east) National Forest sites, and really enjoyed the solitude and cheap living. Usually, the park can be accessed within a 20 minute drive from many of these sites. They are first come, first served though, and some roads may be too rough for low clearance vehicles and large trailers/ RVs.

What To Do

I feel silly writing about this, because it would seem obvious to some. But Rocky Mountain National Park really is one of those parks with so much to see and do, it may help to have a few things highlighted for the first-timers.

Driving

There is so much to see just from the car window, so a good bit of time can be spent driving. From Many Parks Curve and all of Trail Ridge Road to Old Fall River Road and Moraine Park, many beautiful scenes can be seen right from the passenger seat.

alluvial fan, Rocky Mountain National Park, CO

Driving Trail Ridge Road, Rocky Mountain National Park, CO

Trail Ridge Road (TRR) is one of the great, paved alpine roads through the Rockies. Drivers can wind up from Deer Ridge Junction to top out at over 12,000 feet elevation. Keep in mind that Trail Ridge Road closes in mid-October, due to the high elevations. There are many stops along the way to get out and experience, including (but not limited to): Many Parks Curve, Lava Cliffs, Alpine Ridge Trail, Medicine Bow Curve, etc. The Alpine Visitor Center is your best spot for info, restrooms, gifts, and refreshments. It sits atop near the highest point in the road (12183 ft) and boasts phenomenal views. TRR is a must drive for anyone visiting RMNP. Just be sure to hydrate, as it is common to experience symptoms of altitude sickness at these elevations.

Driving Trail Ridge Road, Rocky Mountain National Park, CO

Old Fall River Road is a one-way alternate route to the top of TRR. Starting about a mile past the Alluvial Fan, cars can switchback their way through forests past gorgeous flowing streams, up steep switchbacks to get a whole different view of the subalpine and alpine ecosystems. Eventually arriving up at the Alpine Visitor Center, at the top of Trail Ridge Road. Keep in mind that this road is only open from July 4 through September. Be sure to take it slow, and bring plenty of water!

silhouetted cyclists on trail ridge road, Rocky Mountain National Park, CO

Wildlife Viewing 

This is one of the best parks in the U.S., except possibly Yellowstone, to view wildlife. Rocky Mountain elk, moose, deer, black bear, coyote, eagles, hawks, fox, pika, big horn sheep, and more can all be seen in one day here.

Cow moose with baby Rocky Mountain National Park, CO

bull elk in velvet in Rocky Mountain National Park, CO

Slowly driving the main roads is one great way to see wildlife. Begin early and stay late are the mottos of successful wildlife watchers. Dawn and dusk are the best times to see animals, just about anywhere. It can be a gamble to see anything during the heat of the day. Animals are typically resting in shaded areas hidden by the dense forests and rocky outcroppings, making spotting them nearly impossible.

Bull Elk resting in high alpine tundra of Rocky Mountain National Park, CO

Bighorn sheep crossing the road in Rocky Mountain National Park, CO

For very specific tips on where to find certain wildlife, and how to photograph them, see my new eBook, The Photographic Guide to Rocky Mountain National Park.

Bighorn sheep crossing the road in Rocky Mountain National Park, CO

Cow moose in the Colorado River, Rocky Mountain National Park, CO

american robin, Rocky Mountain National Park, CO

Two Mule deer bucks spar on the side of the road during the rut in rocky mountain national park.

Rocky Mountain Bull Elk, Rocky Mountain National Park, CO

Hiking

In 2013 massive flooding occurred in the town of Estes Park and parts of the eastern side of RMNP. Please check with a ranger station for up to date trail conditions before embarking on any hikes.

hikers, Rocky Mountain National Park, CO

RMNP has  hundreds of miles of scenic trails throughout the park, ranging from very easy, to very difficult. Depending upon your skill level there really is something for everyone. Be sure always to hydrate more than you think you need to, and try to avoid late afternoon hiking in the Summer, as lightning is a very real danger.

A front rolls in over Long's Peak in spectacular color.

Long's peak from Bear Lake, Rocky Mountain National Park, CO

The Bear Lake trailhead offers several stunning, but heavily trafficked hikes. Due to its high volume of visitors, there are shuttles available to avoid the potential parking nightmare.

rocky-mountain-bear-lake-trail-map

The best (and most popular) from the Bear Lake trailhead is, of course, Dream Lake. Download the map above! This is a fairly easy hike and very heavily used, but for good reason. Starting at the Bear Lake trailhead, it is only a few miles to stunning alpine views of Hallett and other peaks. The trail passes Nymph Lake, then up to incredible Dream Lake, and if you keep going, the next reward is Emerald Lake. All three are beautiful and worth seeing and photographing in their own rights. You may not beat the crowds with this hike, but it is certainly a “must see & do”.

hikers at dream lake, Rocky Mountain National Park, CO

Sunrise at Dream Lake, Rocky Mountain National Park, CO

waterfall near emerad laek, Rocky Mountain National Park, CO

There are over 300 miles of trails to hike in RMNP. And all of them have merit. Consult the book recommended above for more great hikes, specific to what you’re looking to see/ achieve.

Backpacking

There are so many great backpacking opportunities within the boundaries of Rocky Mountain National Park, well, and many more in the immediately surrounding areas for that matter. If you plan to backpack in RMNP, you will need a few things specific to the park: First, stop at the Wilderness Office for a permit and current wilderness information. For more info, go HERE. You will also need a bear proof food container. I recommend this one. Next, you will need a good map. The one provided above is great for basics, but if you choose to venture out in to the backcountry, you will definitely want this map.

Timber Creek, Rocky Mountain National Park, CO

sunrise at Odessa Lake, Rocky Mountain National Park, CO

Creek flowing out of Odessa Lake, Rocky Mountain National Park, CO

Fern Lake, Rocky Mountain National Park, CO

This is clearly a Rocky Mountain NP specific, (very) short list. If this is your first time backpacking, I recommend reading up on what gear and clothing you will need generally, and how to prepare for several nights in the backcountry. Any time you step in to the wilderness, life becomes very serious, and all about survival. That statement is not meant to scare anyone away from enjoying such an experience, it is simply to highlight the fact that trekking into the wild, with none of the comforts/ securities of modern life can take many people by surprise. Search and rescue missions have increased exponentially in recent years, often due to the unpreparedness of people. Be aware! And enjoy responsibly.

night at Odessa Lake, Rocky Mountain National Park, CO

If you are looking for a beautiful, quick overnighter, Timber Lake, and Odessa Lake are my favorites. Both are under 8 miles one way and offer beautiful views, and a wonderful backcountry experience. The Timber Lake trailhead is on the east side of the park, just 10 miles north of Grand Lake. Odessa Lake can be accessed either from the Bear Lake or Fern Lake trailheads.

Fishing

Sport fishing is allowed in the park, and all that is required is a valid Colorado fishing license. There are many idyllic streams, lakes, and rivers within the park to break out the fly rod or spinner reel, where one can experience peace and solitude. But be aware of any regulations and or conservation efforts in place before packing up and heading out. All current regulations and information can be found HERE.

creek in forest, Rocky Mountain National Park, CO

Fly fishing Dream Lake, Rocky Mountain National Park, CO

Dream Lake outlet waterfall in Rocky Mountain National Park, CO

creek near dream lake, Rocky Mountain National Park, CO

timber creek, Rocky Mountain National Park, CO

Photography

This park is one of my favorite for all of its photographic opportunities. Regarding landscape, wildlife, stars, and general nature photography, it is one of the best.

Stars over dream lake, Rocky Mountain National Park, CO

columbine, Rocky Mountain National Park, CO

A front rolls in at dawn over Long's Peak in spectacular color.

There are of course the tourist spots, where you’ll be elbowing other people to get some of the classic postcard shots, but then there are the off the beaten path spots. I am now putting major time and effort into providing you with all of my favorite secrets within our National Parks, and I’m excited to announce Rocky Mountain NP as my first eBook! You can look forward to maps, locations, photo tips, and much more in this soon-to-be-released eBook. Pre-order it HERE to get a discount.

smooth rose, Rosa blanda, Rocky Mountain National Park, CO

Stars over Long's Peak and Bear lake in Rocky Mountain National Park.

I hope you have found this information useful. Even more than that though, I hope this encourages you to get out and experience one of our national natural treasures, Rocky Mountain National Park! As always, for the most up to date, comprehensive park information, please visit the official NPS website for RMNP.

— Andrew


Ellen and I have hit the road full-time! Help us on our mission to inspire and educate everyone on the importance of getting outside by checking out my workshops and my prints, made #ontheroad in my mobile print studio. The revenue will help propel us further and further on this great adventure. Enrich yourself and others… and feel great about it too as you’re helping to ensure our wild lands are cherished and to keep the wild spirit of the American Dream alive. Our goal is to visit all 59 National Parks in 2-4 years. LEARN MORE ABOUT WHAT WE’RE DOING HERE


Want to learn photography and enjoy a guided experience? Check out my exciting, NEW workshop dates:
 
TELLURIDE // LANDSCAPE + MOUNTAIN LIGHT // 2016 – SOLD OUT
TELLURIDE // LANDSCAPE + MOUNTAIN LIGHT (Trip 2) // 2016 – ONLY 3 SPOTS AVAILABLE
LOCAL + PRIVATE WORKSHOP// 2016 – AFFORDABLE RATES FOR ME TO COME TO YOU
BIG BEND // LANDSCAPE + NIGHT SKY // 2017 – MOST POPULAR! 7 SPOTS AVAILABLE
 
I’m excited to announce my “A Photographic Guide To Our National Parks” Ebooks:
 
See what’s NEW
 
If you are interested in purchasing a “print from the road”, please check my prints for sale, or email me directly for a custom request:
 
Andrew R. Slaton | photographer // prints
 
If you are interested in licensing any of the images/ video from this post, please visit my stock agency:
 
Tandem Stills + Motion // Andrew R. Slaton
Image Brief // Andrew R. Slaton
  
For assignment work requests, please email me: andrew@andrewslatonphoto.com
 
Thanks for visiting AndrewSlatonBlog.com!
 
all images and content © ARS Media, LLC 2016
Standard
education, photography, travel

Photographing // Tents

Yeah, it’s a thing.  And if you follow me on Instagram, you know that I clearly enjoy it.

Photographing tents in amazing places is trending on Instagram and other social media outlets, and for good reason… it makes for incredible, eye-catching images and it’s really fun.

ARS_WY_150725_2793

Recently, I’ve begun experimenting with the sources of light inside the tent… but when I began, one might say it was a little less calculated and a bit more haphazard.

One of the first times I made a ‘lit tent image’, it was almost accidental.  I pointed my camera in the direction of Squaretop, and intended to do a ghosting image of Ellen and I getting into the tent.  The image that was created would send me into an obsession that has really paid off…

ARS_WY_0612_0000 copy

BBNP_0713_0165

ARS_WY_141016_0054

In many ways, it is simply a means to document some of the cool places I have laid my head.  But when I started getting serious stock and print inquiries from these images I realized I was on to something.

Man hiking up to a winter campsite overlooking Fremont Lake in Bridger National Forest, Wy

Social media would blow up every time I posted one of the tent shots, and I began to notice they were showing up all over my Instagram feed from some of my favorite photographers.  Something in these shots was resonating with people.

ARS_WY_150206_1392

Dusk, colorful sky, and lit tent under a silhouetted Nugent Mountain

ARS_SCOTLAND_150521_7659

So I began doing them all over the world and experimenting a bit.

ARS_SCOTLAND_150522_7973

I’ve used everything from cruddy headlamps, to Canon Speedlights, to my Dynalite strobes. And at this point, I’m not set on one method… I know I have a bit more searching to do to find the one best lighting solution that is compact and lightweight enough to take deep into the backcountry when backpacking.

Any recommendations are much appreciated :)

ARS_WY_150718_0228

But one of the things that I have learned over the years of experimenting is that your best bet is to shoot your tent shots during the blue hour. It is the hour +/- just after the sun has set, or just before the sun rises.  I prefer the evening blue hour because it seems to have a quality of light to it that is better to photograph.  But also because you have the daylight first, which allows you to more easily compose your image before it gets too dark. You get to ease into the shot.

ARS_WY_150725_2794

The blue hour is the optimum time for your artificial light to match the exposure and desired color temperature with the sky.

Dusk at Sparks Lake

Lit tent on the rim at Crater Lake

Lit tent on the rim at Crater Lake

But even if you wait a bit longer, you can get the stars in the shot, as an added bonus.  But beware, it is more difficult to match the exposures, so it may take a little experimentation.  If you have the ability, turn your lights down several stops.

ARS_WY_150725_2801

Knowing all of this, the first thing you need to determine is your composition.  It is best to figure this out during the day when it’s light out.  Once you have a composition you like, it’s time to think about where the best, most compelling placement of the tent will be.

Camping in Gifford Pinchot National Forest

The example above is actually where I slept.  But recently, I’ve been setting up the tent just for dynamic shots, like the ones below.  I did not venture to sleep where the tent was in the four images below.  Sometimes the best shot is not also the best place to camp. And the best, most comfortable place to camp does not always make for the most interesting shot.

Lit Nemo Equipment tent on the Ohanapecosh River

Lit Nemo Equipment tent on the Ohanapecosh River

Lit Nemo Equipment tent on the Ohanapecosh River

I hope sharing what I’ve learned is helpful and hopefully inspiring. But it is a process, and I will keep refining my craft.

The sun sets on the Pacific and a tent campsite with beautiful displays of color

I’ll keep you all posted as I learn more. And feel free to comment below if you have experiences or recommendations of you own to share!

Until next time…

— andrew


Join me on an amazing adventure… check out my NEW workshop dates:
 
Big Bend NP // Night/ Landscape // 2016
Isle of Skye // S C O T L A N D // 2016
Highlands // S C O T L A N D // 2016
 
 
If you are interested in licensing any of the images/ video from this post, please visit my stock agency:
 
Tandem Stills + Motion // Andrew R. Slaton
Image Brief // Andrew R. Slaton
 
If you are interested in purchasing prints from this post, please check my prints for sale, or email me directly for a custom request:
 
Andrew R. Slaton | photographer // prints
 
For assignment work requests, please email me: andrew@andrewslatonphoto.com
 
Thanks for visiting AndrewSlatonBlog.com!
 
all images and content © ARS Media, LLC 2015
 
 
Standard