Yeah, it’s a thing. And if you follow me on Instagram, you know that I clearly enjoy it.
Photographing tents in amazing places is trending on Instagram and other social media outlets, and for good reason… it makes for incredible, eye-catching images and it’s really fun.

Recently, I’ve begun experimenting with the sources of light inside the tent… but when I began, one might say it was a little less calculated and a bit more haphazard.
One of the first times I made a ‘lit tent image’, it was almost accidental. I pointed my camera in the direction of Squaretop, and intended to do a ghosting image of Ellen and I getting into the tent. The image that was created would send me into an obsession that has really paid off…


In many ways, it is simply a means to document some of the cool places I have laid my head. But when I started getting serious stock and print inquiries from these images I realized I was on to something.

Social media would blow up every time I posted one of the tent shots, and I began to notice they were showing up all over my Instagram feed from some of my favorite photographers. Something in these shots was resonating with people.


So I began doing them all over the world and experimenting a bit.

I’ve used everything from cruddy headlamps, to Canon Speedlights, to my Dynalite strobes. And at this point, I’m not set on one method… I know I have a bit more searching to do to find the one best lighting solution that is compact and lightweight enough to take deep into the backcountry when backpacking.
Any recommendations are much appreciated :)

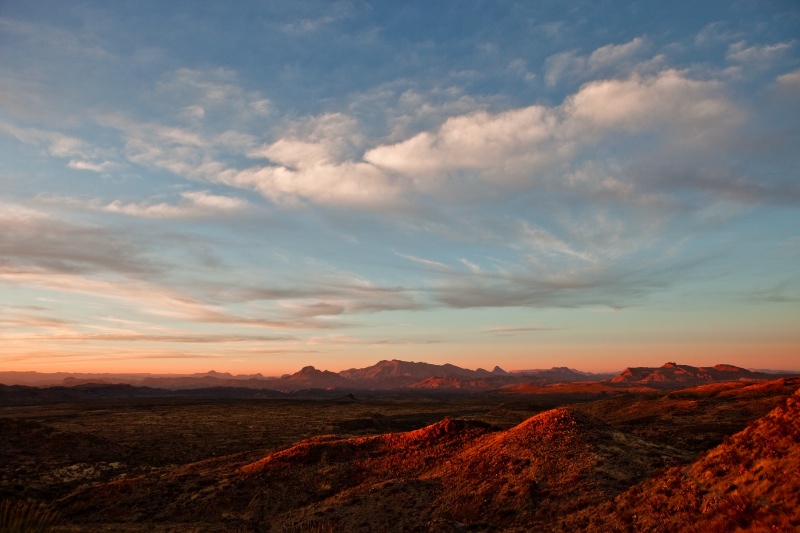
But one of the things that I have learned over the years of experimenting is that your best bet is to shoot your tent shots during the blue hour. It is the hour +/- just after the sun has set, or just before the sun rises. I prefer the evening blue hour because it seems to have a quality of light to it that is better to photograph. But also because you have the daylight first, which allows you to more easily compose your image before it gets too dark. You get to ease into the shot.

The blue hour is the optimum time for your artificial light to match the exposure and desired color temperature with the sky.


But even if you wait a bit longer, you can get the stars in the shot, as an added bonus. But beware, it is more difficult to match the exposures, so it may take a little experimentation. If you have the ability, turn your lights down several stops.

Knowing all of this, the first thing you need to determine is your composition. It is best to figure this out during the day when it’s light out. Once you have a composition you like, it’s time to think about where the best, most compelling placement of the tent will be.

The example above is actually where I slept. But recently, I’ve been setting up the tent just for dynamic shots, like the ones below. I did not venture to sleep where the tent was in the four images below. Sometimes the best shot is not also the best place to camp. And the best, most comfortable place to camp does not always make for the most interesting shot.


I hope sharing what I’ve learned is helpful and hopefully inspiring. But it is a process, and I will keep refining my craft.

I’ll keep you all posted as I learn more. And feel free to comment below if you have experiences or recommendations of you own to share!
Until next time…
— andrew
Join me on an amazing adventure… check out my NEW workshop dates: Big Bend NP // Night/ Landscape // 2016 Isle of Skye // S C O T L A N D // 2016 Highlands // S C O T L A N D // 2016 If you are interested in licensing any of the images/ video from this post, please visit my stock agency: Tandem Stills + Motion // Andrew R. Slaton Image Brief // Andrew R. Slaton If you are interested in purchasing prints from this post, please check my prints for sale, or email me directly for a custom request: Andrew R. Slaton | photographer // prints For assignment work requests, please email me: andrew@andrewslatonphoto.com Thanks for visiting AndrewSlatonBlog.com! all images and content © ARS Media, LLC 2015